
Edit Cycling Video in Premiere Pro
Work with Vectora overlays inside Adobe Premiere Pro.
This tutorial shows a simple workflow: create a Premiere Pro project, import your footage + Vectora overlay video, stack them in the timeline, sync, then export.
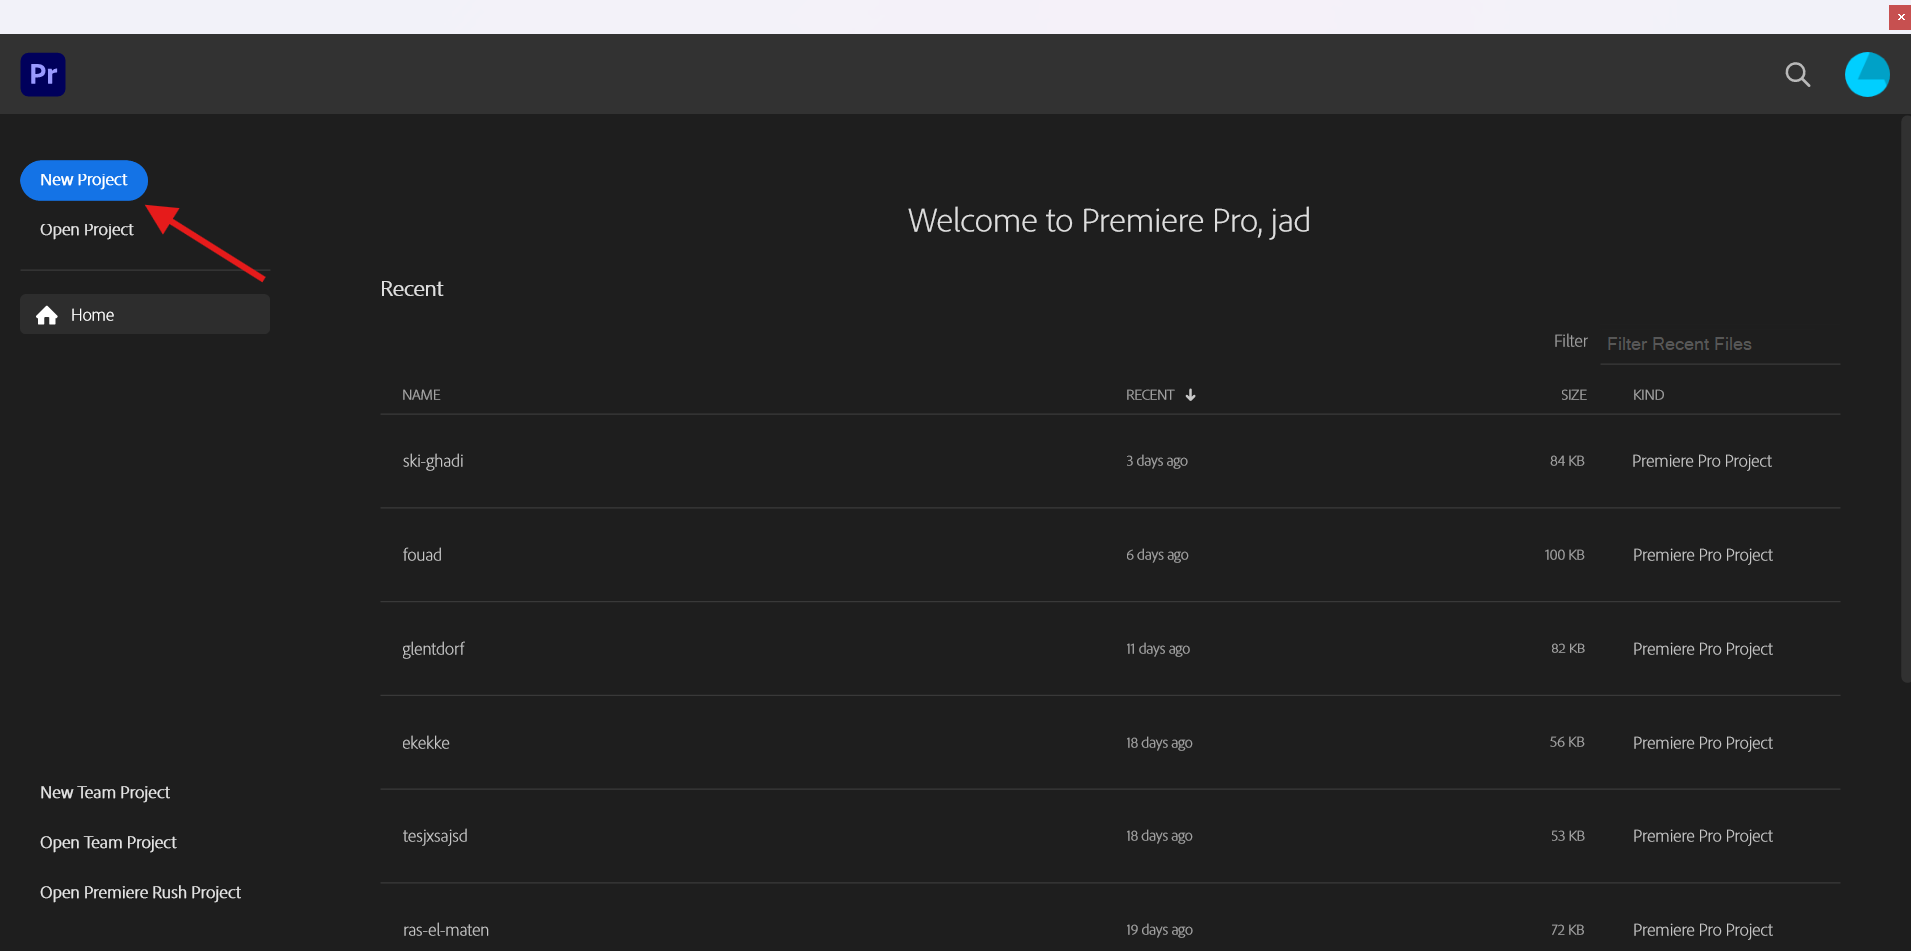
1) Launch Premiere Pro: open Adobe Premiere Pro and choose “New Project”.
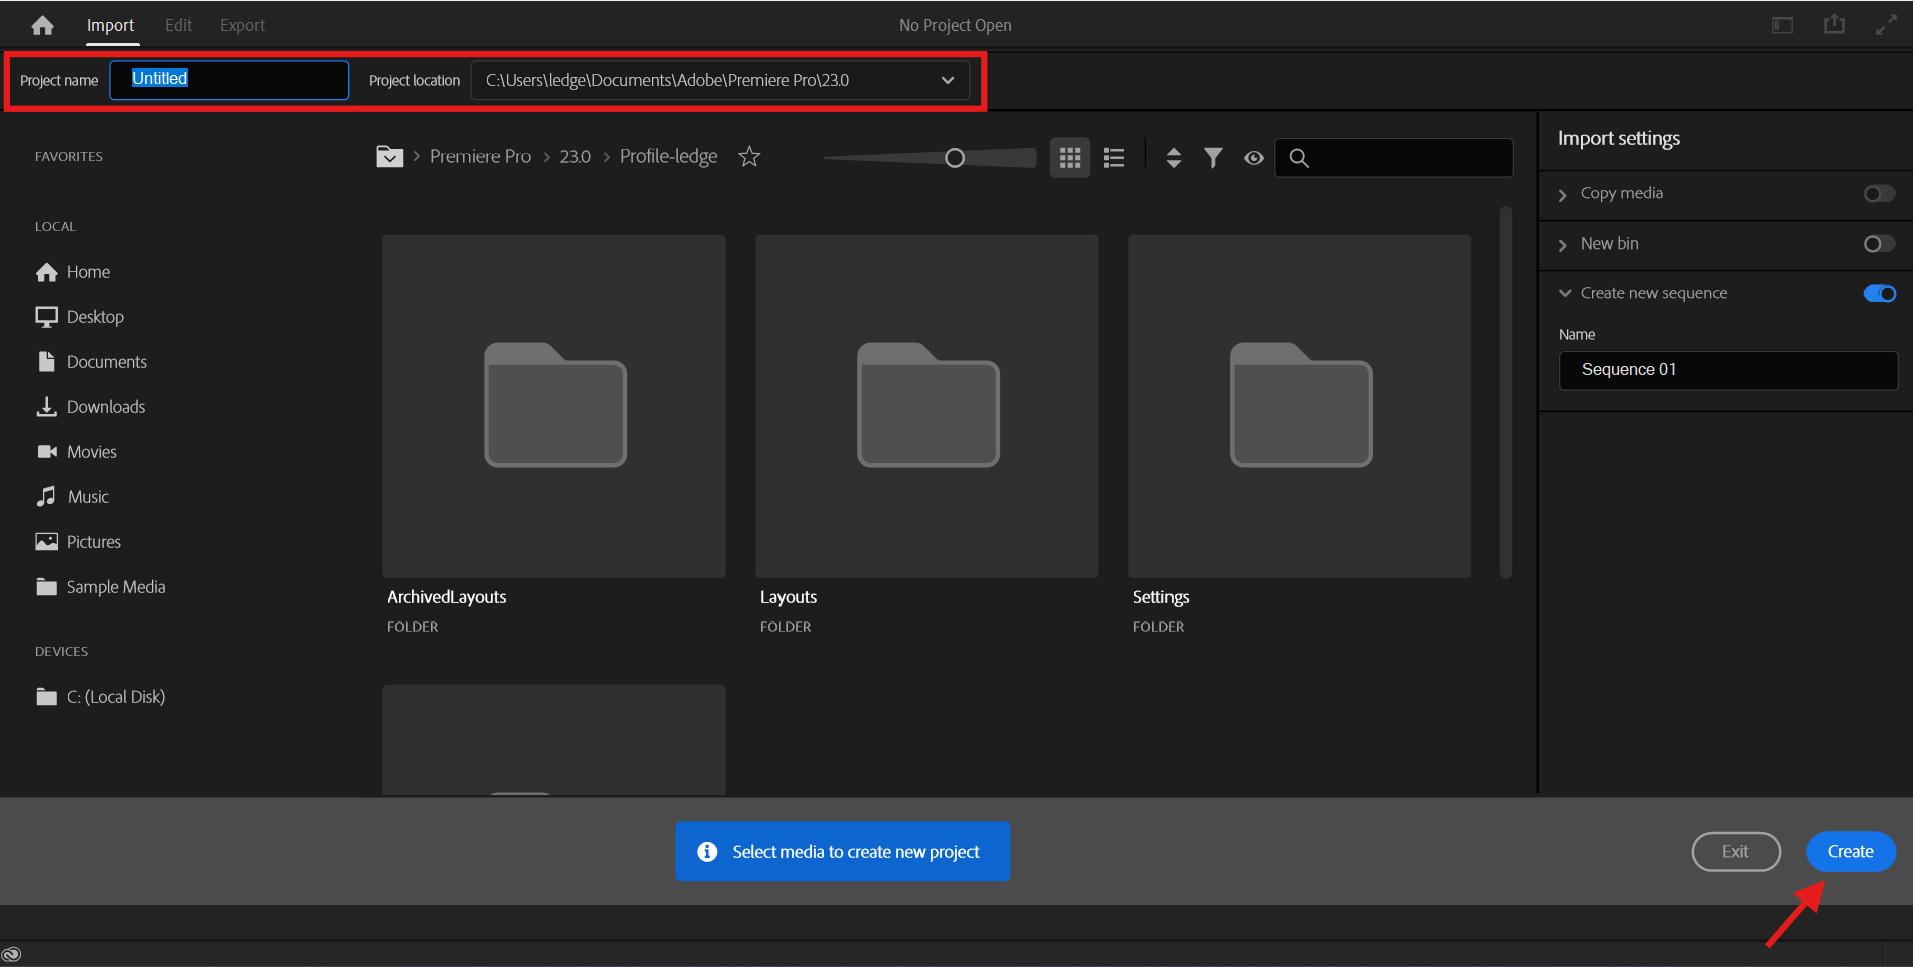
2) Create a project: set a project name + location, then click “Create”.
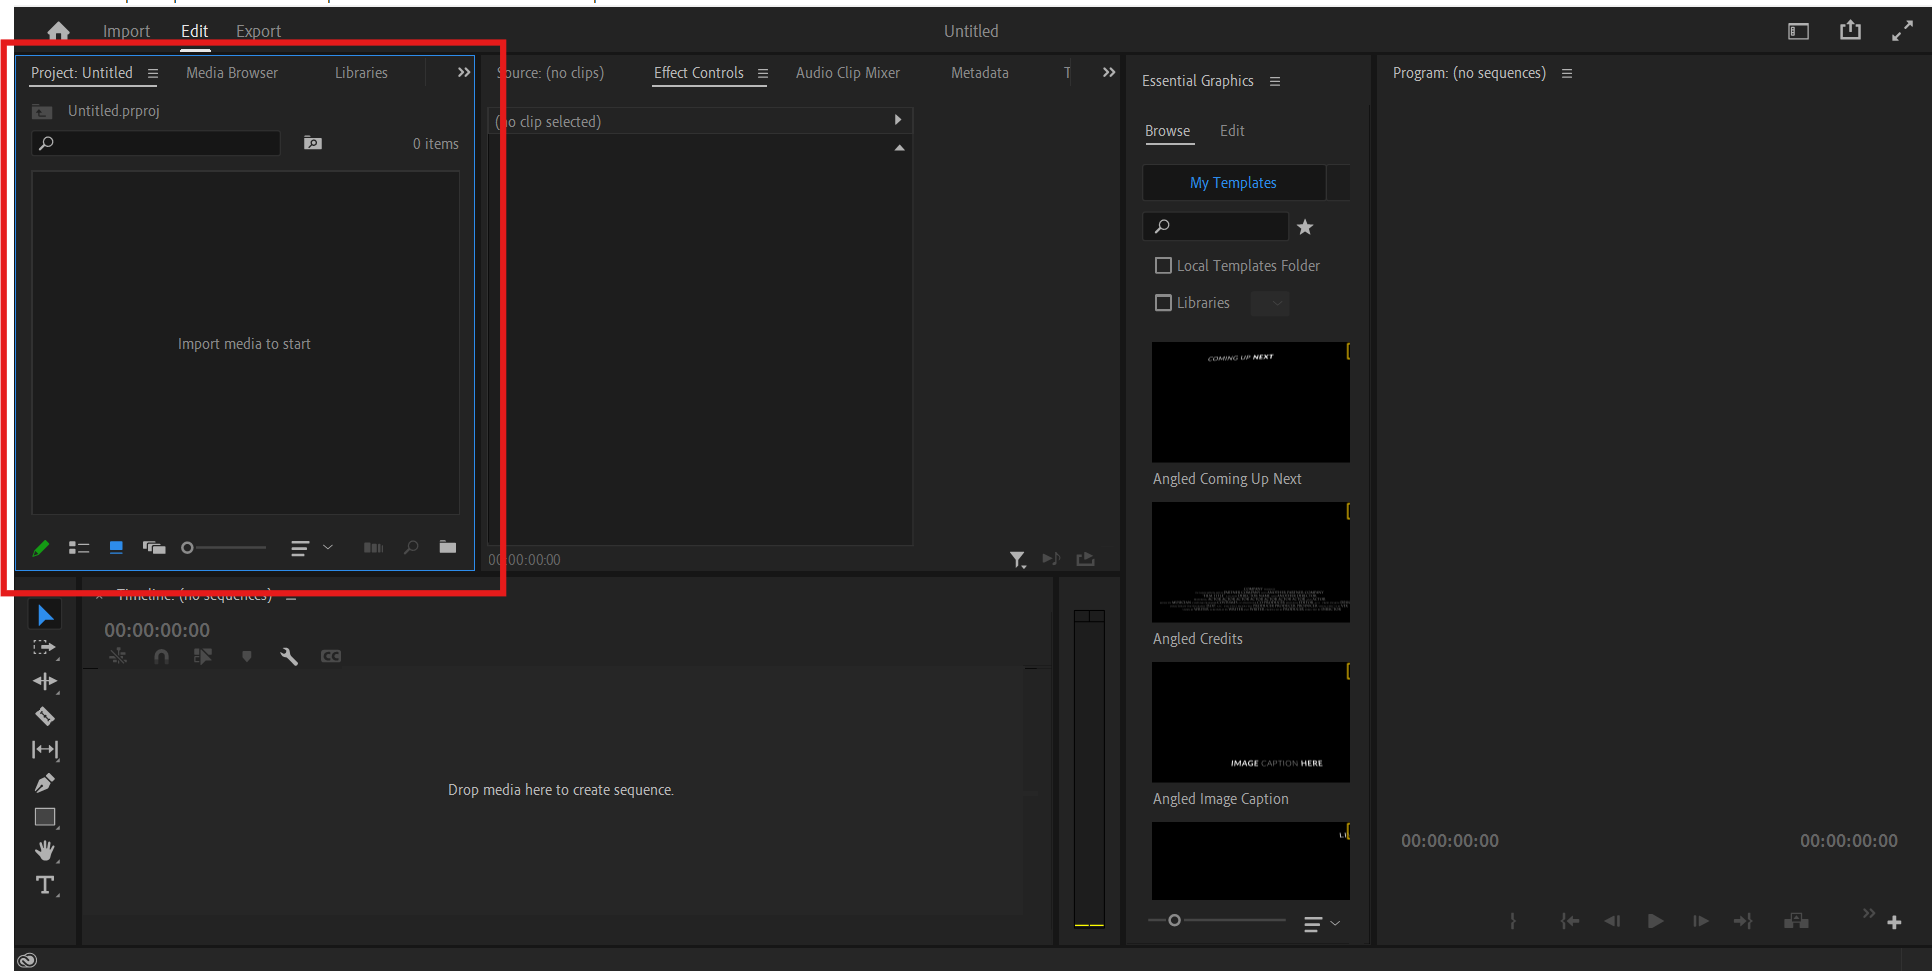
3) Import your files: bring in (a) your main footage video and (b) your Vectora overlay video (downloaded from Vectora’s Tasks panel after rendering).
Tip: keep both files in the same folder so Premiere’s media relinking stays painless.
4) Create a sequence that matches your footage: drag your main footage onto the “New Item” icon (or right-click → “New Sequence From Clip”). This ensures resolution and FPS match your camera footage.
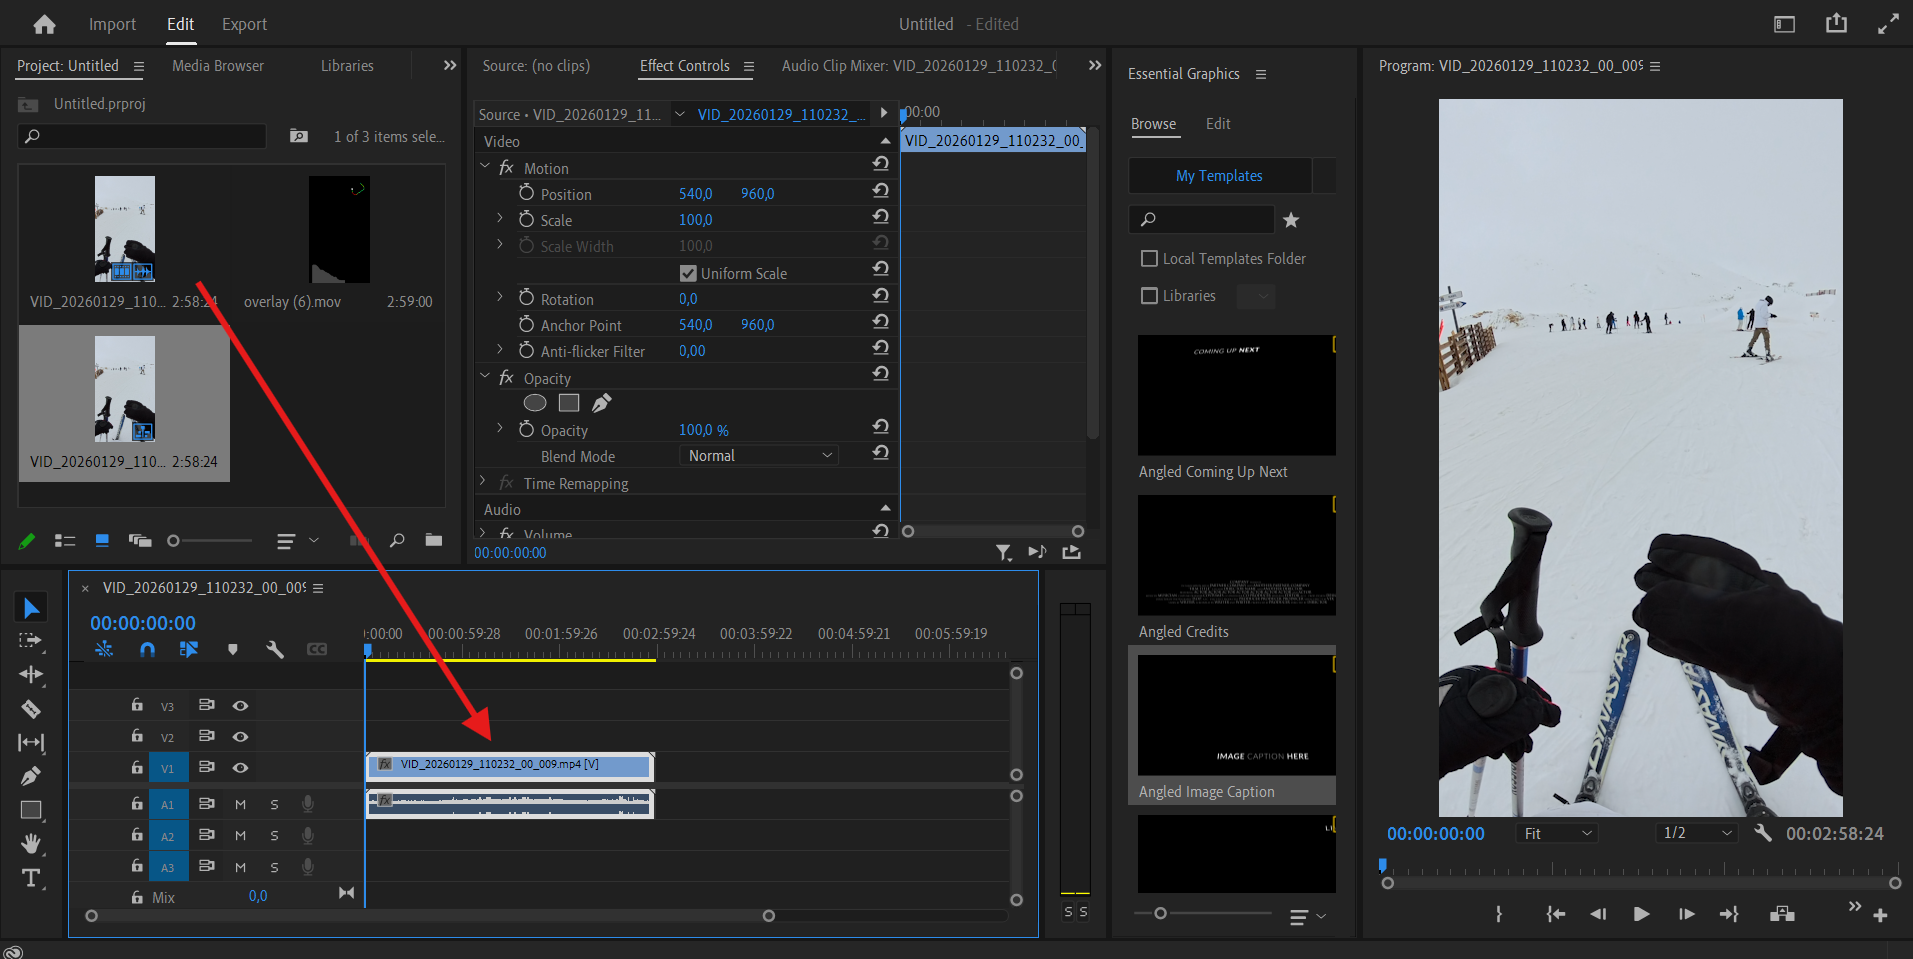
5) Add the footage to the timeline: put your main footage on V1 (Video Track 1).
6) Add the overlay above it: put the Vectora overlay clip on V2 (Video Track 2) directly above the footage.
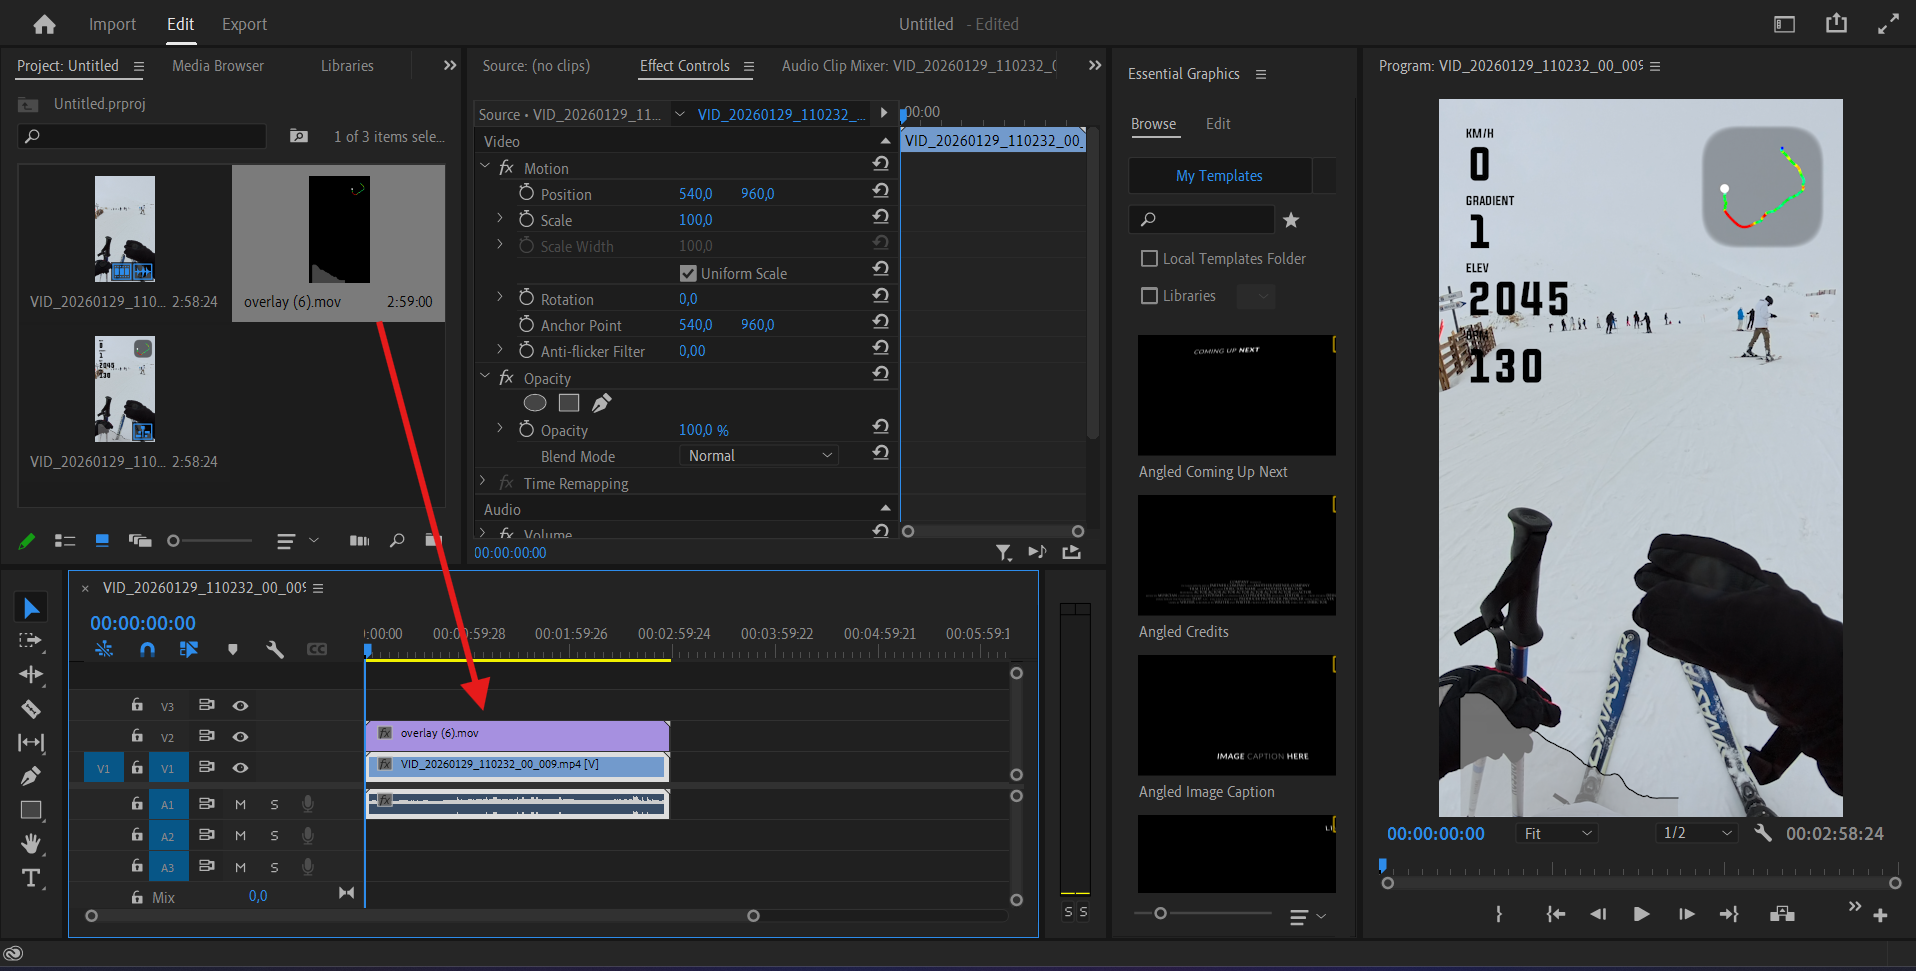
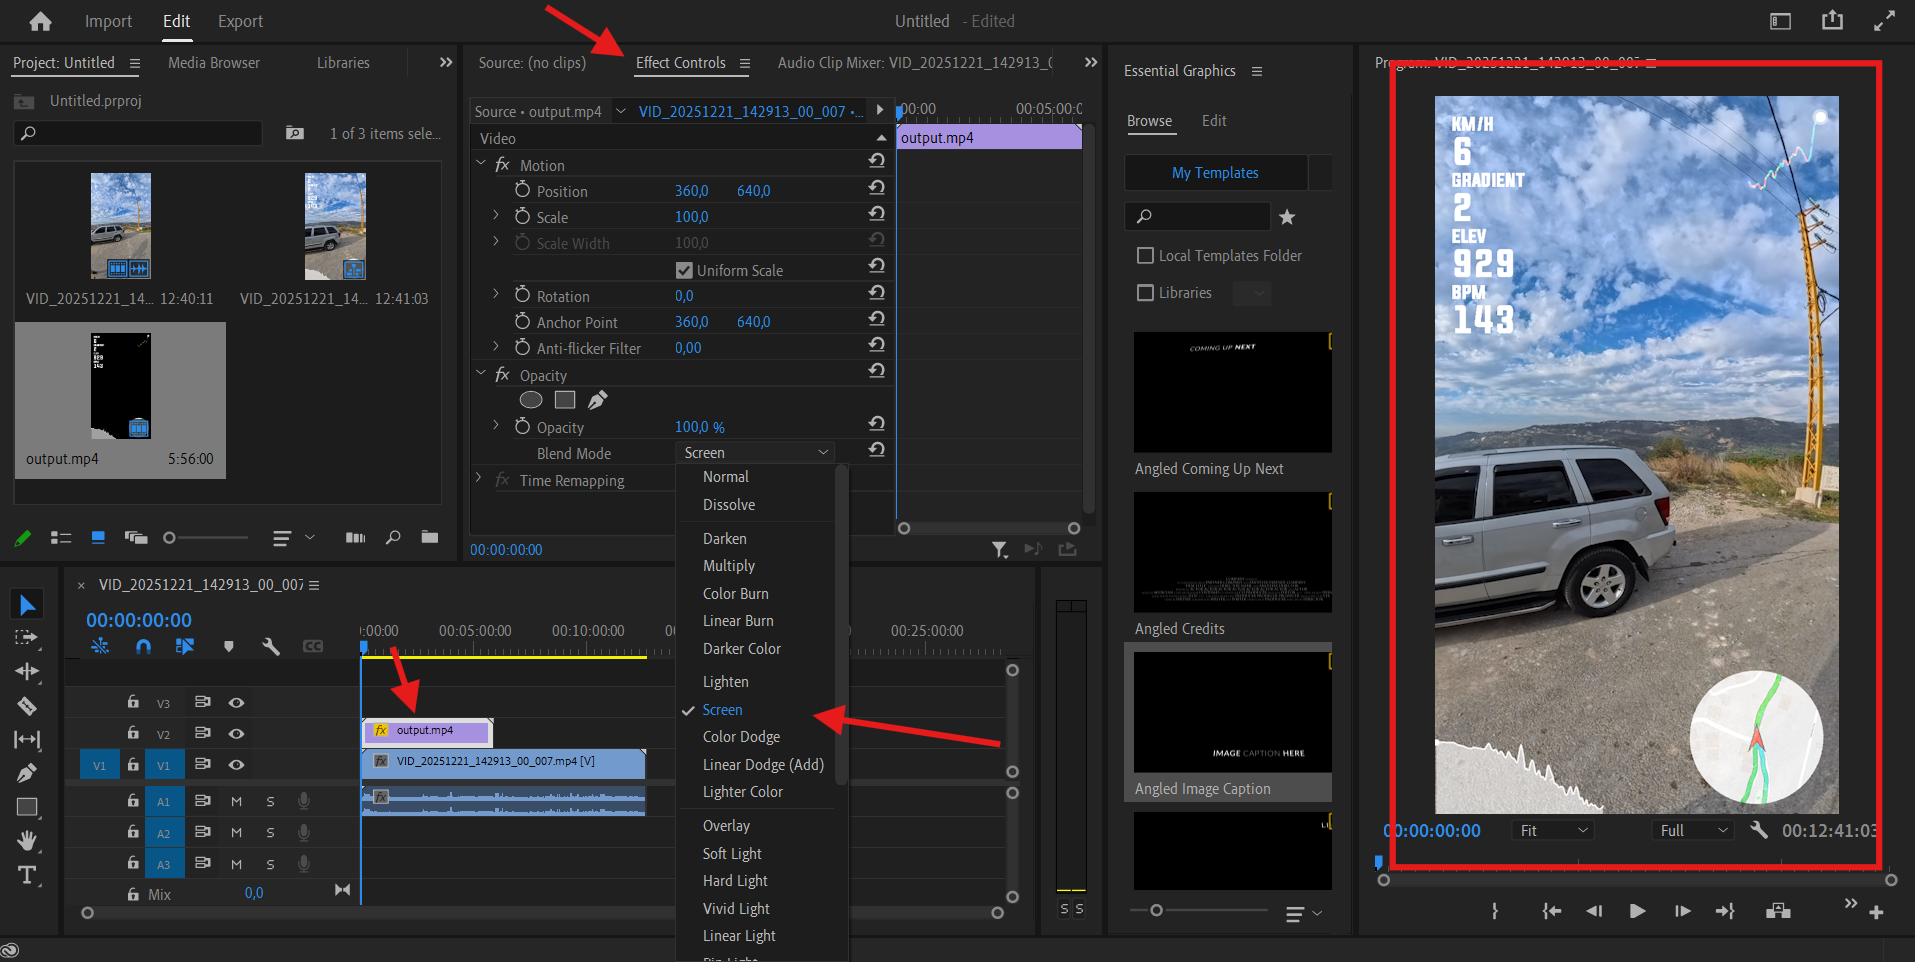
7) Make the overlay visible (depends on the overlay format):
- If the overlay video has transparency (alpha), it should composite automatically when placed on V2.
- If the overlay has a black background, select the overlay clip → Effect Controls → Opacity → Blend Mode, and try “Screen” or “Add” to remove black.
8) Sync the overlay with the footage:
- If your overlay includes a minimap, timestamp, or a distinctive event (stop/start, big turn, sprint), find the same moment in the footage and align the overlay clip so both match.
- Use timeline zoom + markers (M) to place a marker on the sync moment on both clips, then line them up. Sync clips with markers
- If the overlay is slightly early/late, nudge the overlay clip left/right by a few frames.
Related: Syncing Overlay with a Video
9) Fix drift (optional): if the overlay slowly drifts out of sync over time, it usually means the overlay duration doesn’t match the footage segment.
- Double-check you rendered the correct duration in Vectora (Sync panel Start/Duration).
- If needed, you can slightly time-stretch the overlay in Premiere (Speed/Duration) to match the footage.
10) Export: when it looks right, export your edit (File → Export → Media). Choose your preferred format (commonly H.264).