
Getting Started with Vectora
A quick guide for your very first overlay video.
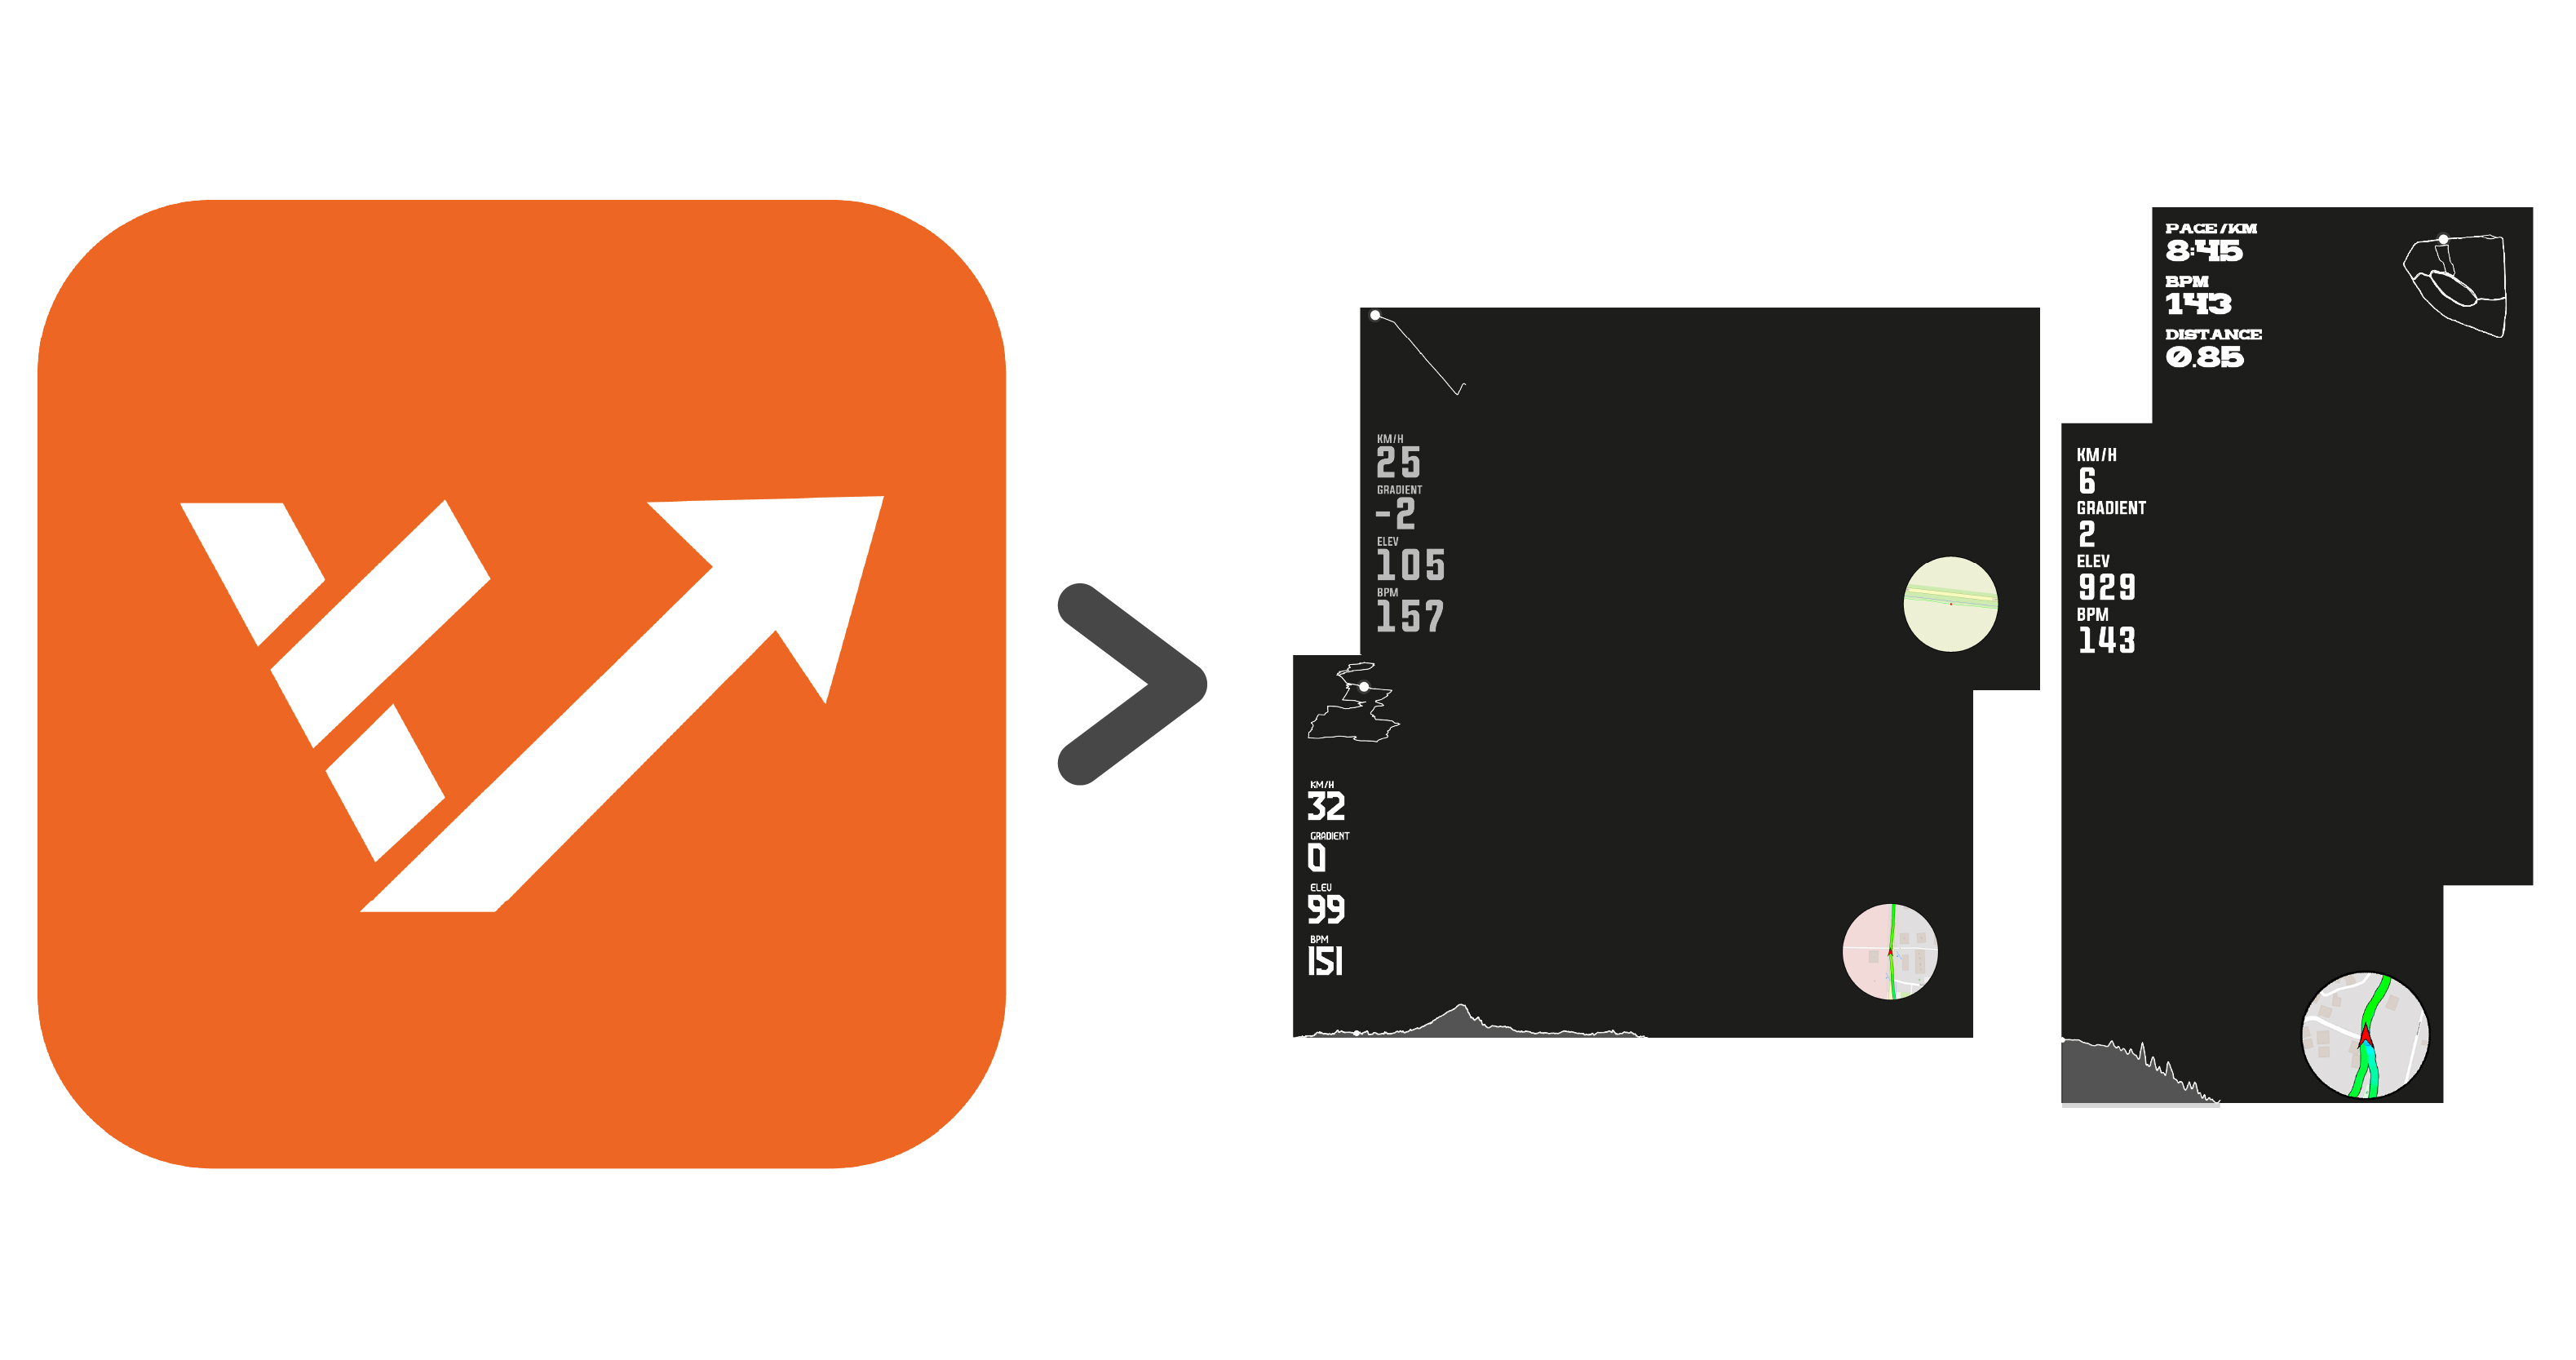
This guide walks you through the exact in-app flow after signing in: create a project, pick a template, preview a frame, then render and download your overlay video.
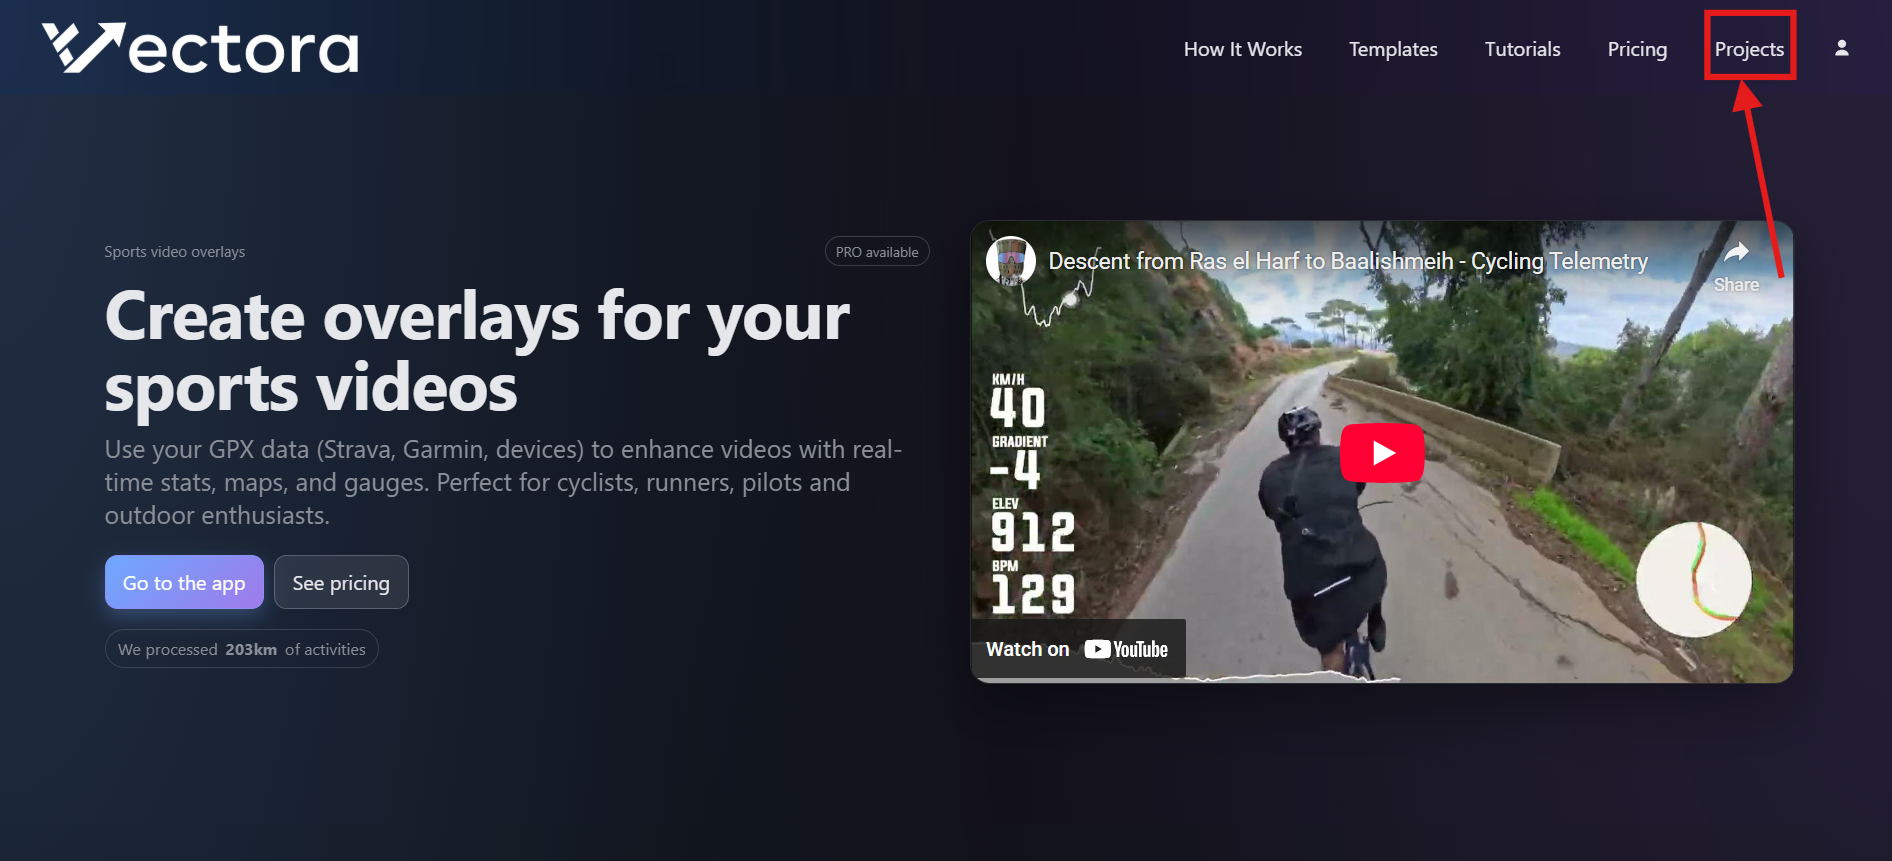
Step 1 — Open Projects: use the top navigation and go to “Projects”.
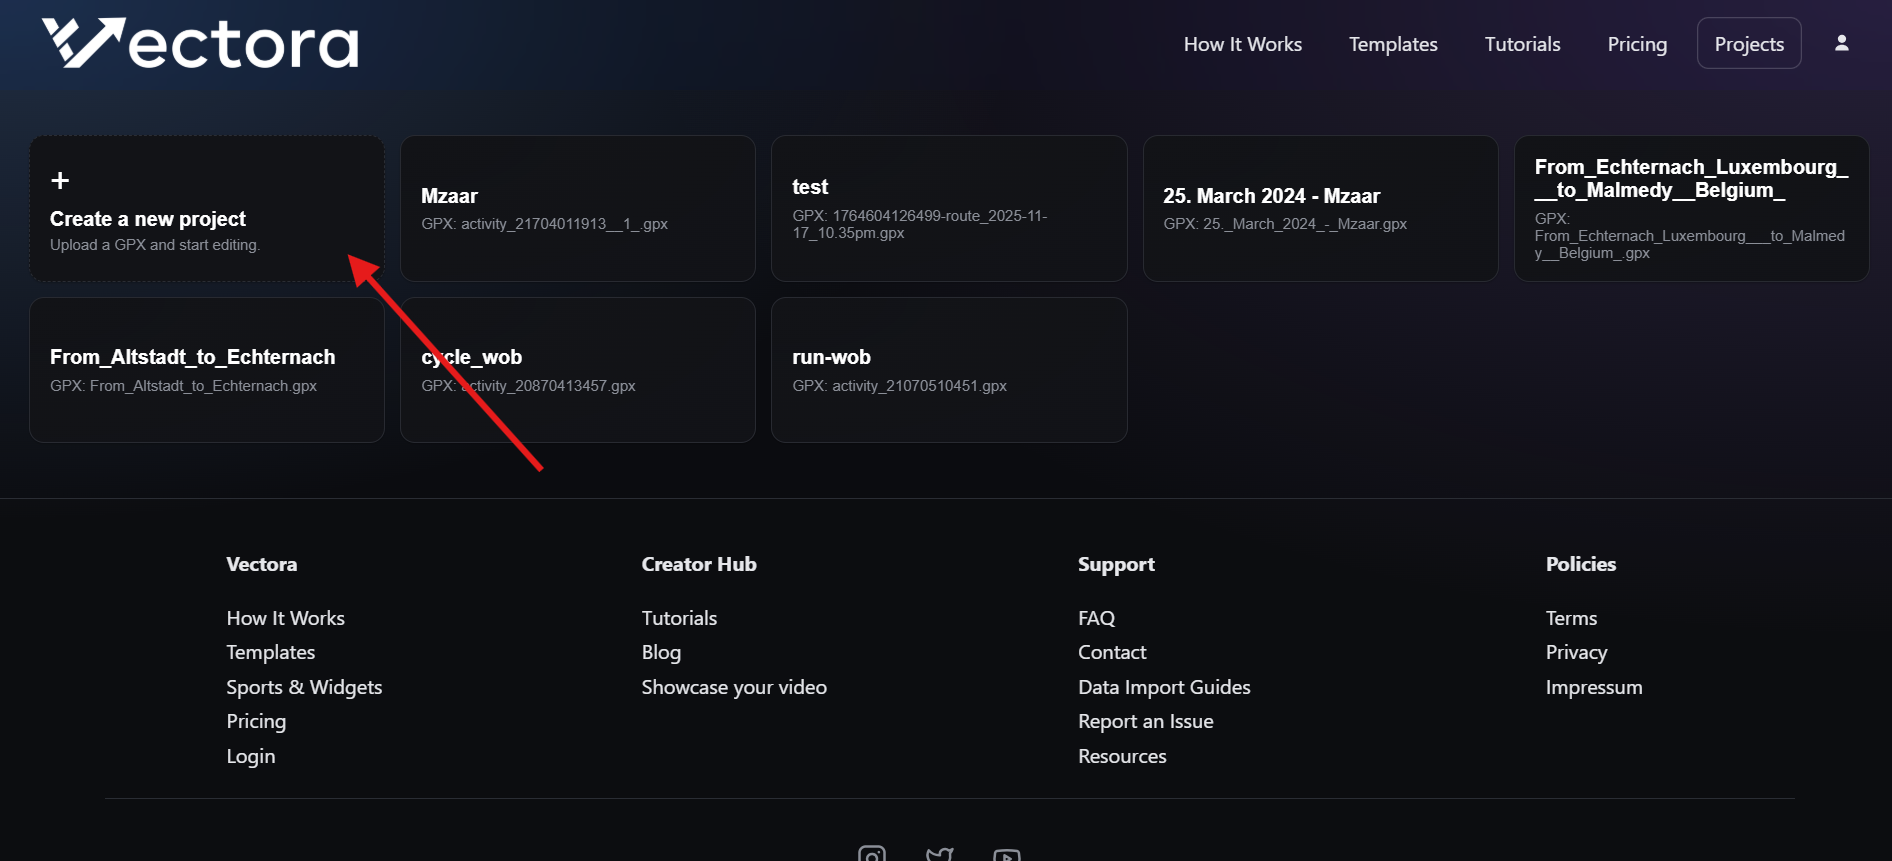
Step 2 — Create a new project: click “Create a new project” (the + card).
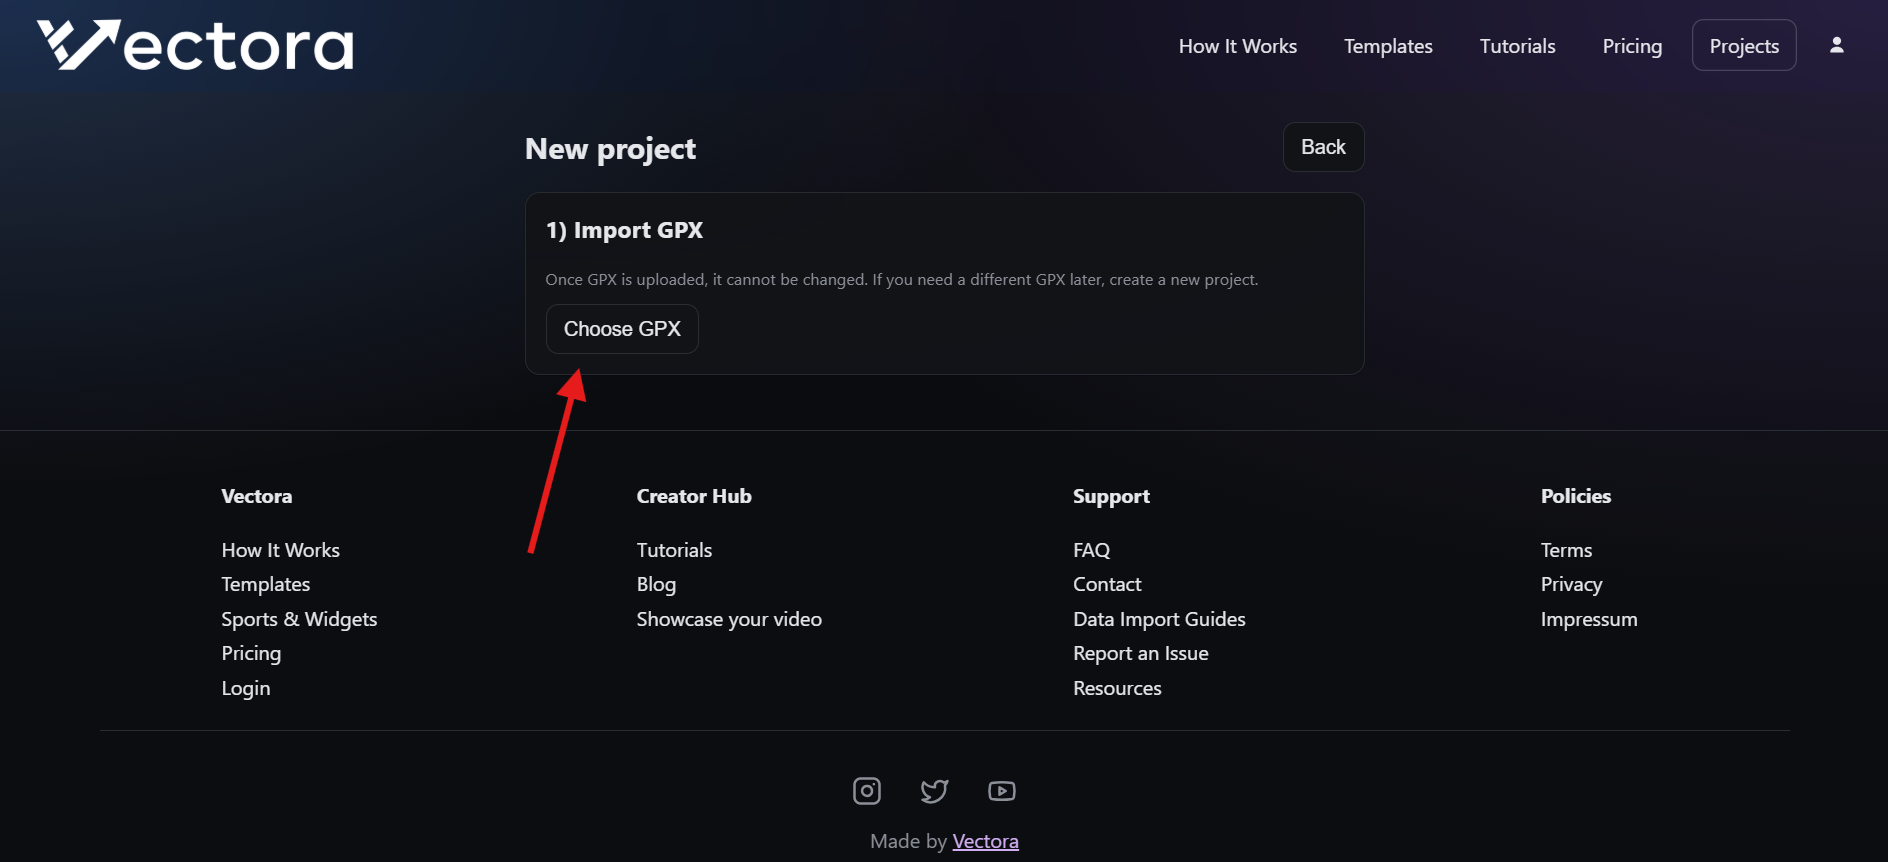
Step 3 — Import your GPX: in “1) Import GPX”, click “Choose GPX” and select a .gpx file from your computer. Wait for the upload to finish.
Step 4 — Name the project: in “2) Set Project Name”, optionally edit the name (it’s pre-filled from the GPX filename), then click “Create”. Vectora opens the editor for that project.
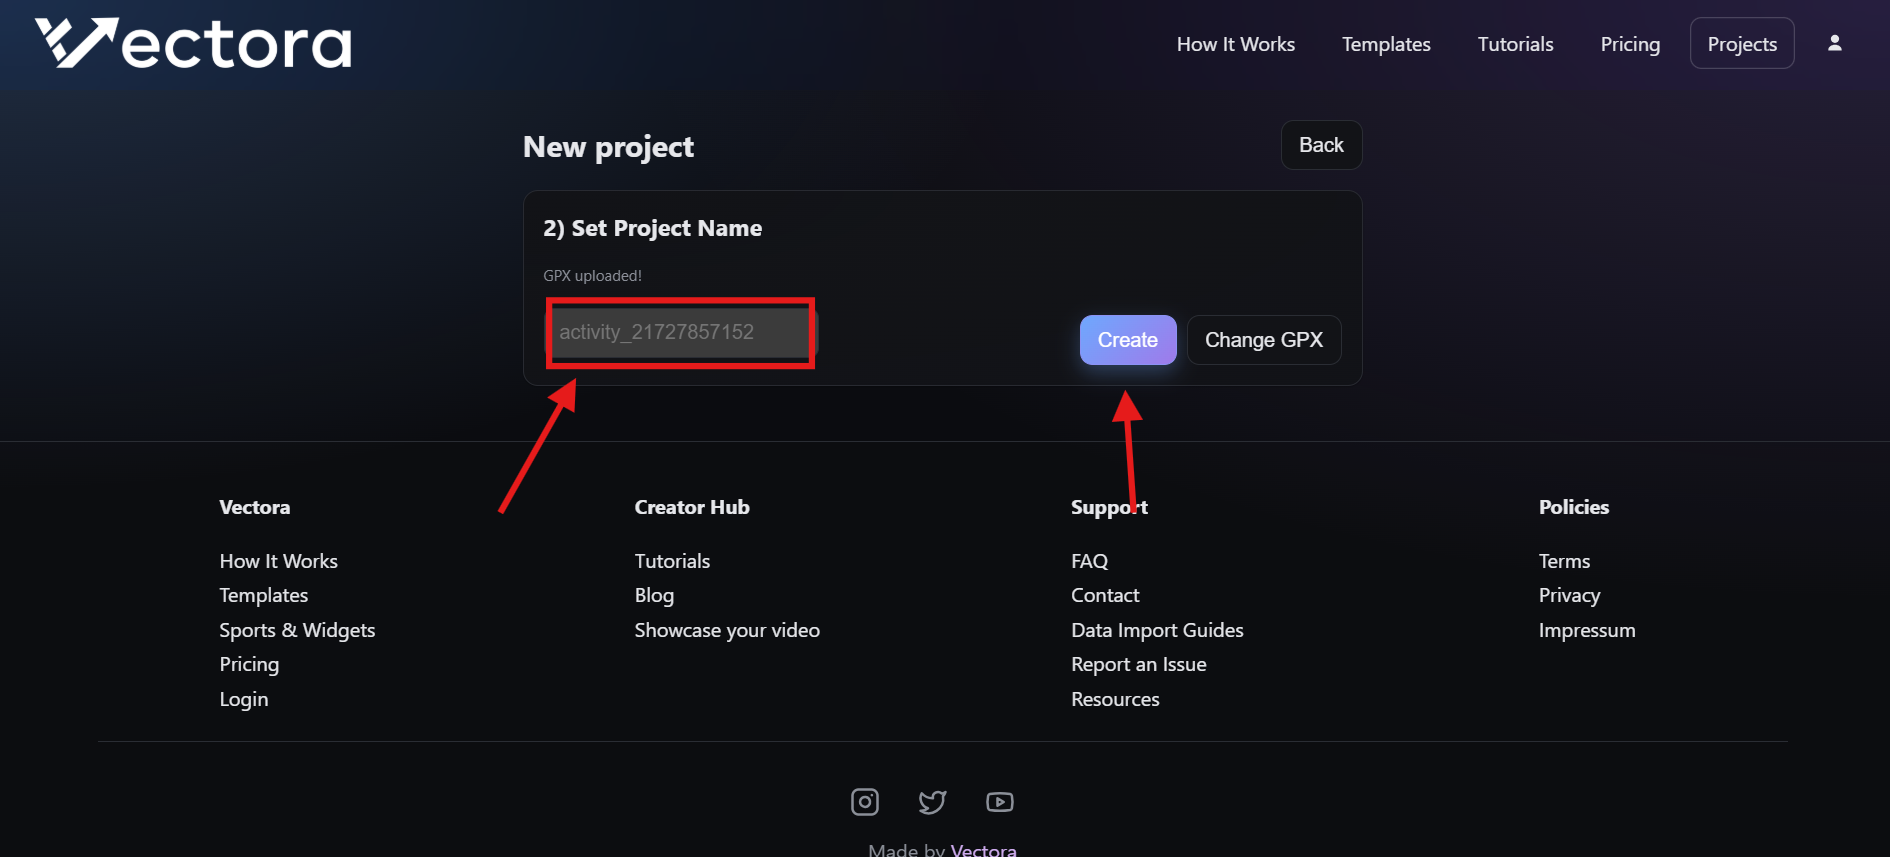
Important: once a project created, the gpx file can’t be changed. If you need a different GPX later, create a new project.
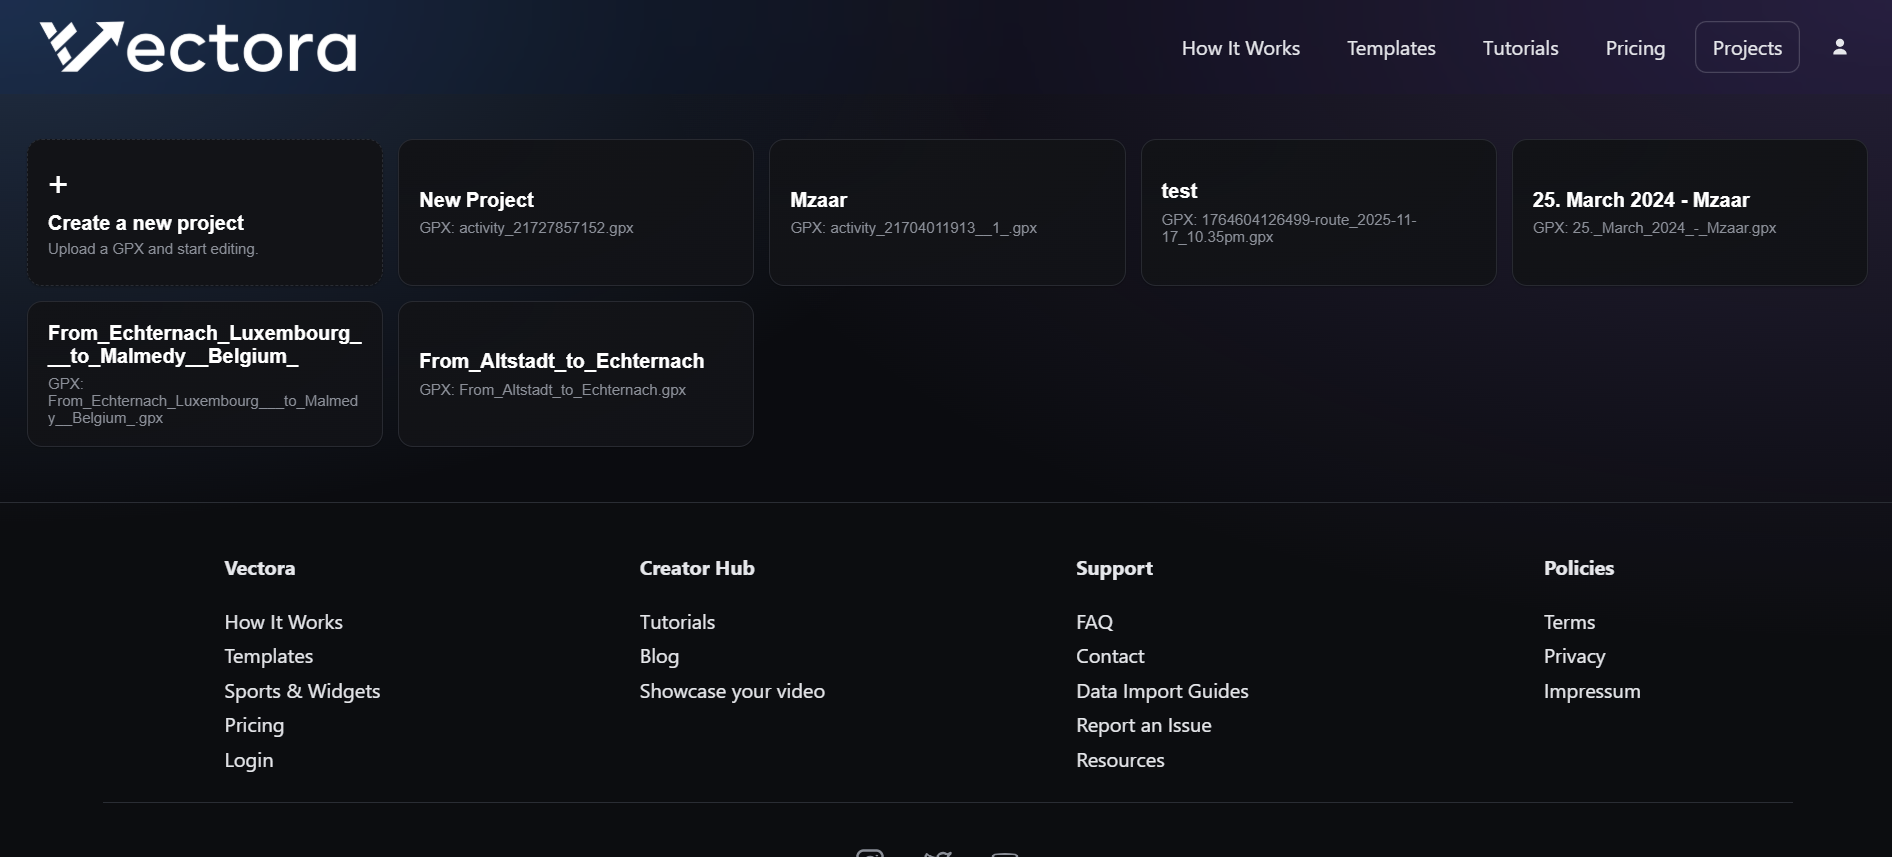
Step 5 — Load an existing project later: go back to “Projects” any time and click a project card to open it again. Inside the editor, use “Change project” to switch projects.
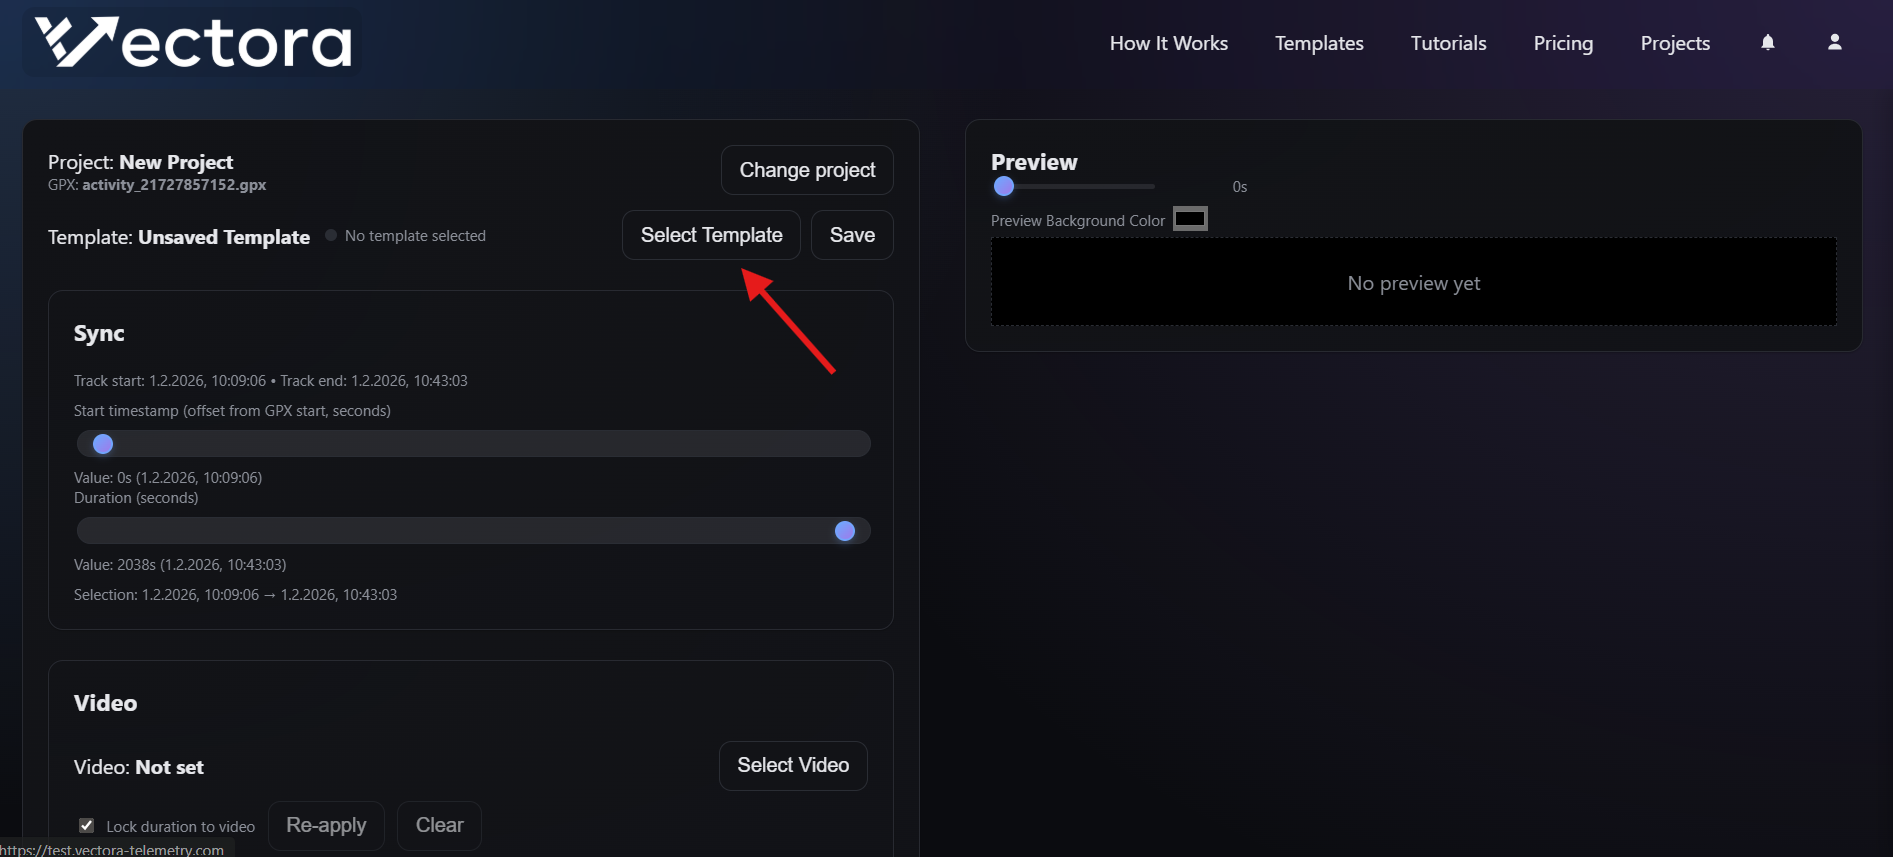
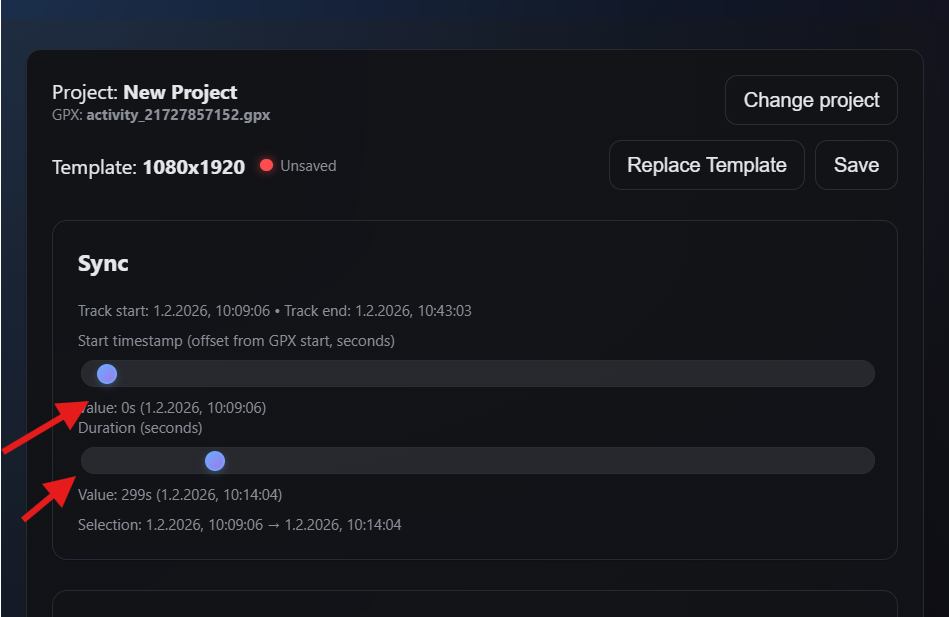
Step 6 — Select a template: in the editor, click “Select Template” (or “Replace Template”). In the “Choose Template” dialog, pick a template from the library dropdown.
Plan note: template availability can depend on your plan. You can check what’s enabled in “Settings” → “Entitlements” → “Templates”.
Step 7 — (Pro) Upload/browse custom templates: on paid plans you can use “Browse Template” to upload a .json template (saved to S3). On free plans this is disabled and shows an upgrade hint.

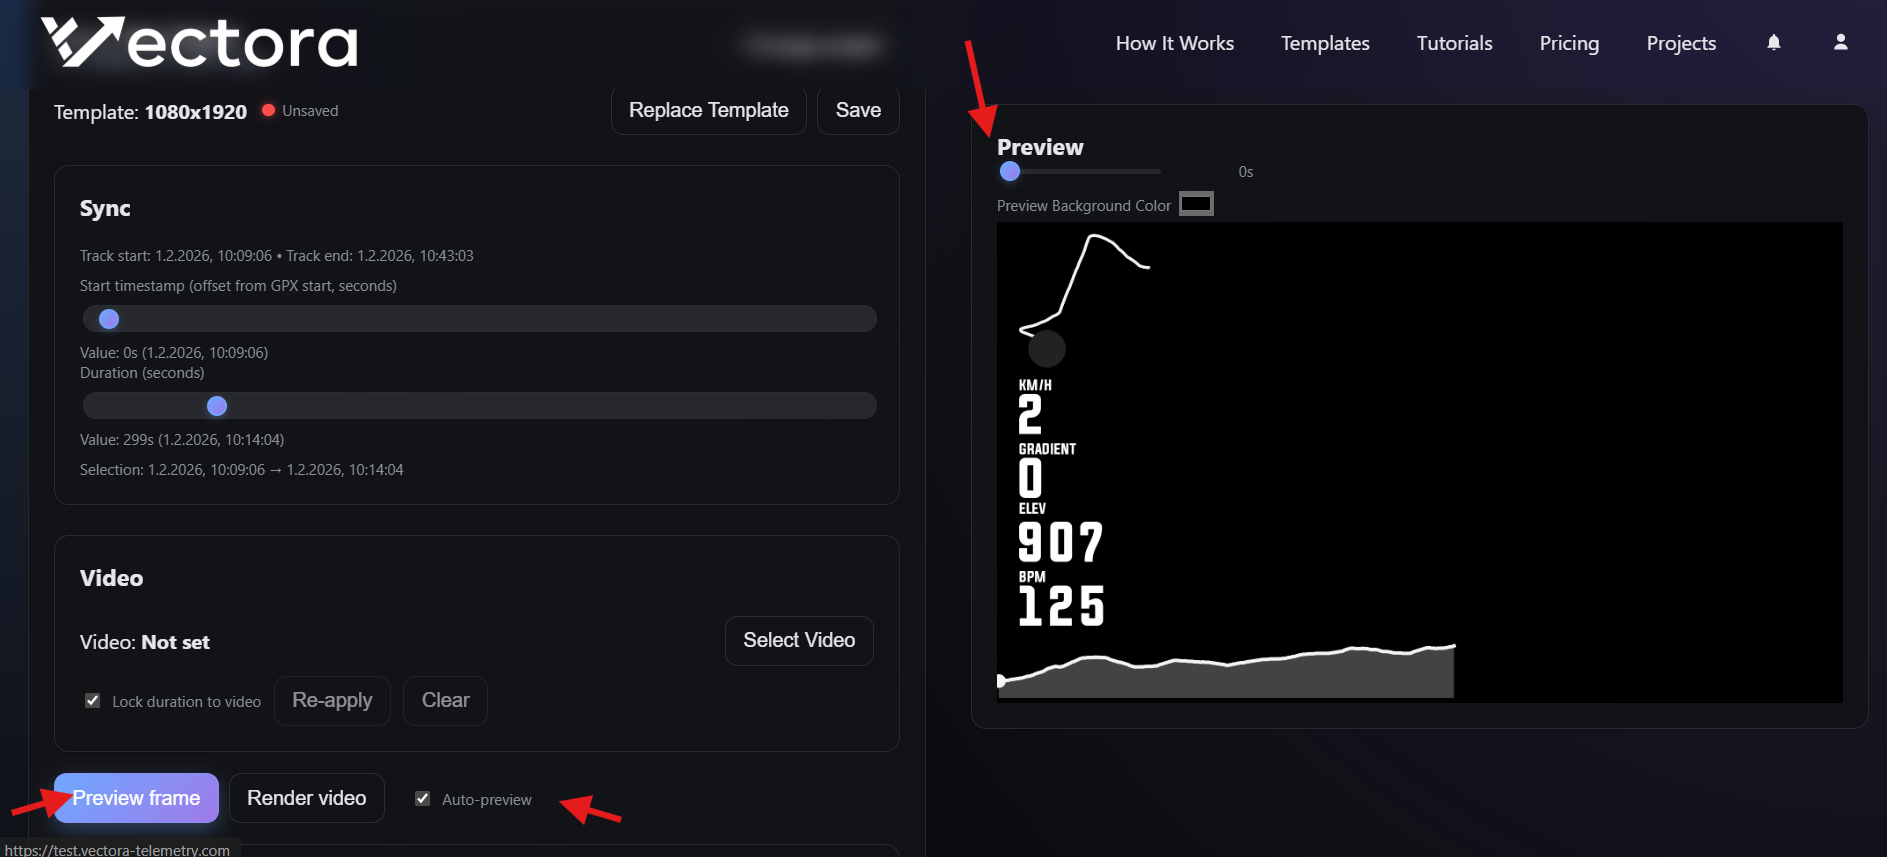
Step 8 — Set the time range: use the Sync panel to adjust Start and Duration. This controls which part of the GPX timeline is used for preview and for the final render.
Optional — Sync to a video without uploading: in the “Video” section, click “Select Video” to pick a local .mp4/.mov/.webm file. Vectora only reads metadata (start time + duration) to help auto-sync; the video is not uploaded. Details can be found in the Syncing Overlay with a Video tutorial.
Tip: keep “Lock duration to video” enabled if you want the overlay duration to match your clip. Use “Re-apply” after swapping videos.
Step 9 — Preview a frame: use the Preview slider to scrub through time. Click “Preview frame” to generate a preview, or press “P” on your keyboard. If “Auto-preview” is enabled, Vectora refreshes the preview as you tweak timing/template settings.
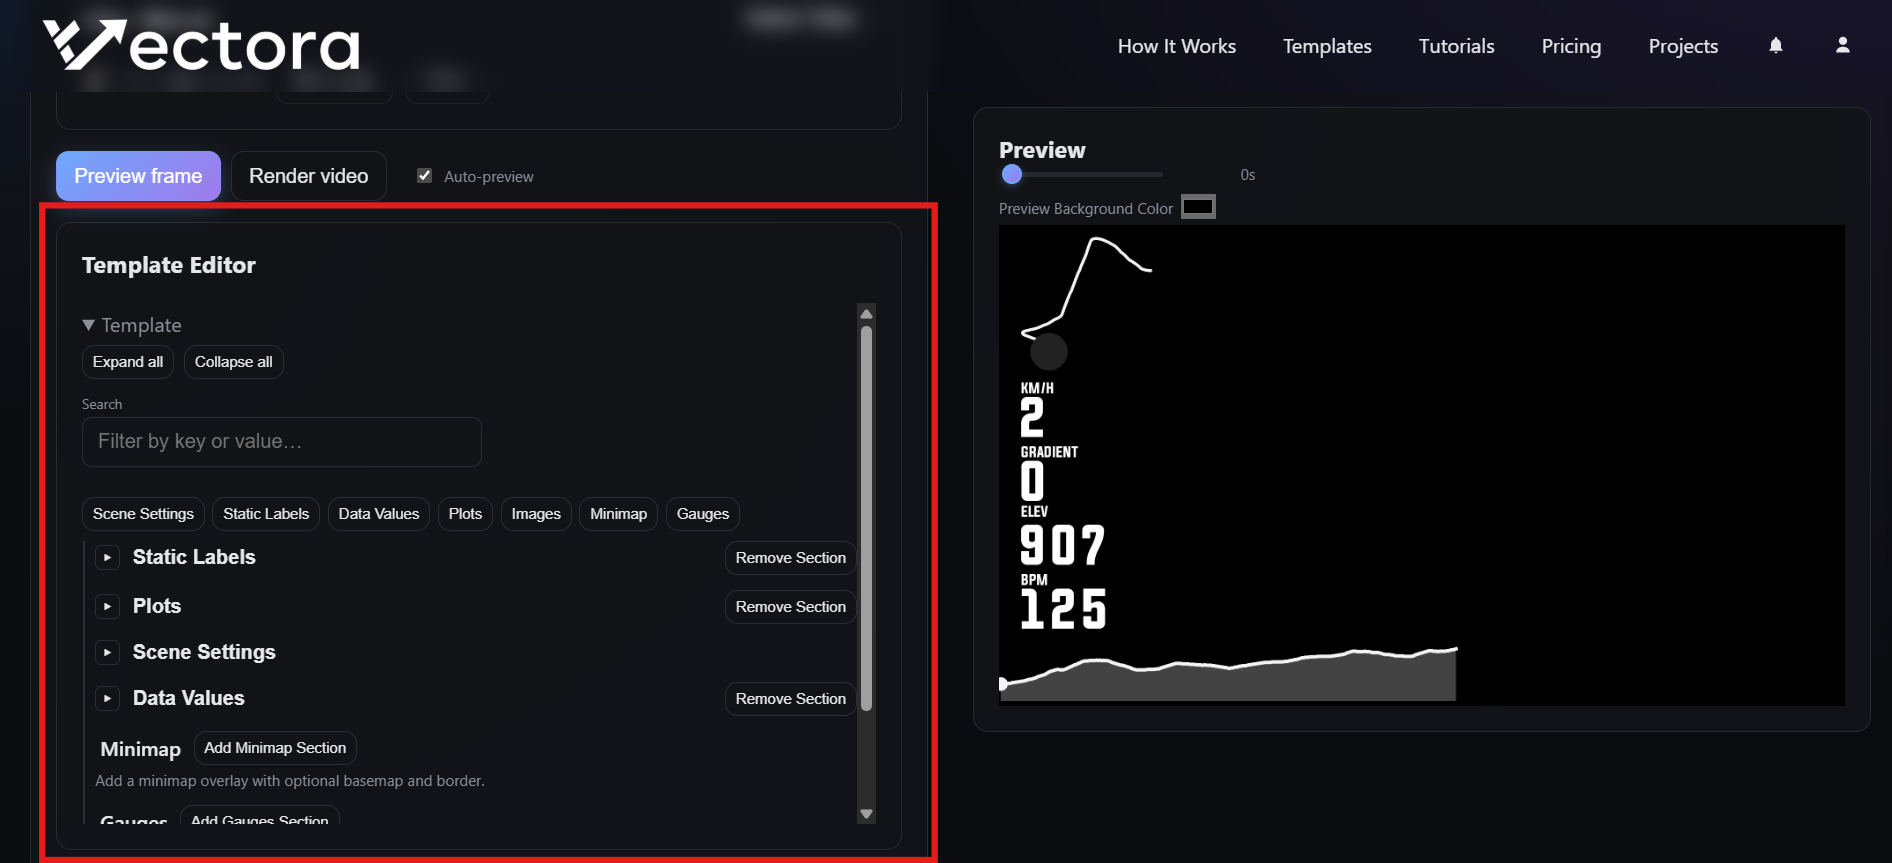
Step 10 — (Pro) Edit the template: the “Template Editor” panel is a paid feature. It lets you search, expand/collapse, and edit the template’s JSON properties (for example positions, sizes, colors, and widget settings).
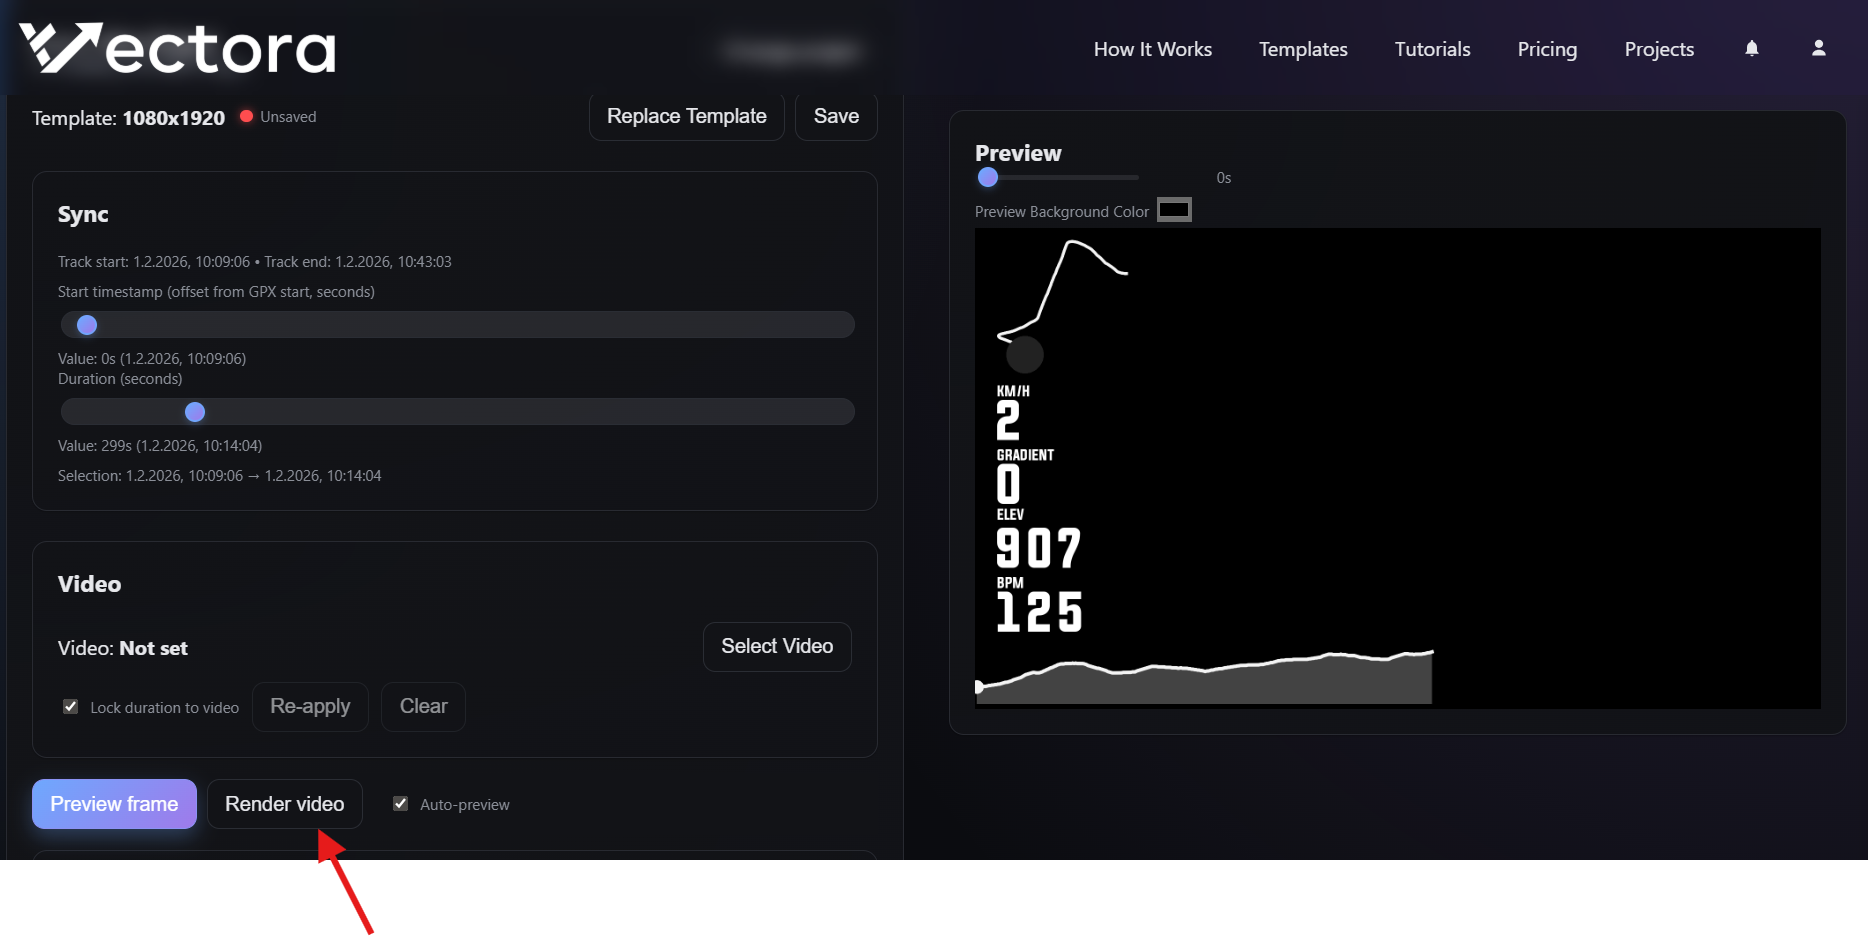
Step 11 — Render the overlay video: click “Render video”, confirm “Start render”, and Vectora will queue a render job. Render time depends on resolution/FPS/duration and template complexity.
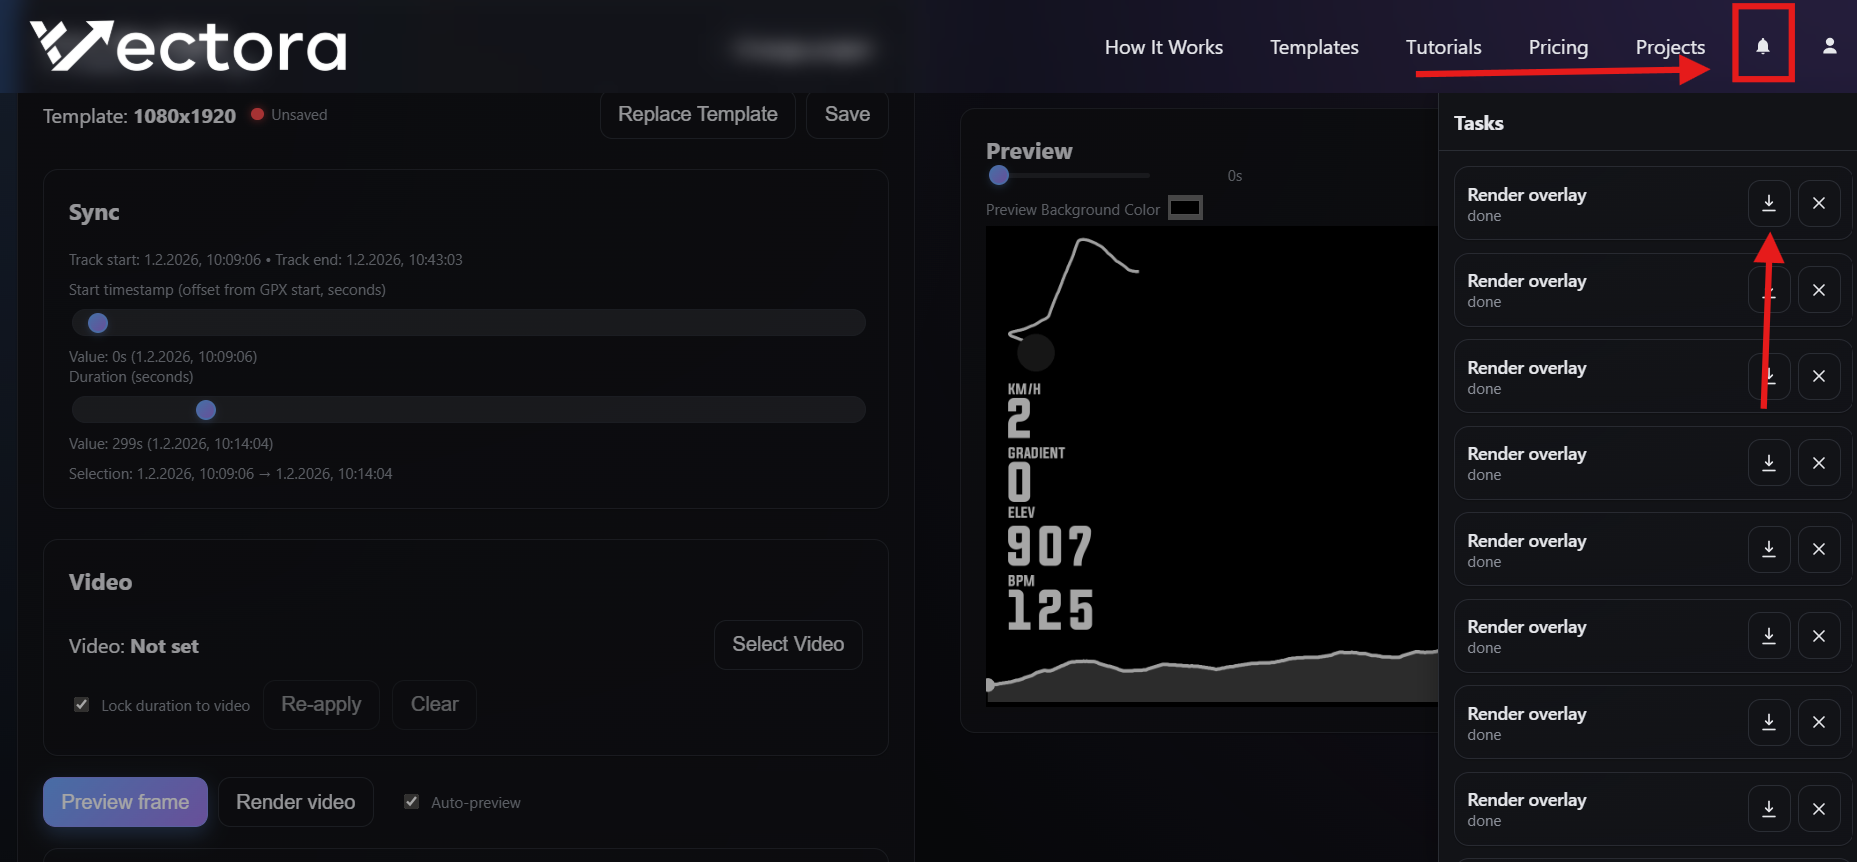
Step 12 — Download: while inside a project, click the “Tasks” bell icon in the header to open the Tasks panel. When the job is done, click the download icon to fetch your rendered overlay video.
Notes: the free plan can limit max video duration (for example 300s). Also, project files and generated outputs are retained for a limited time (typically 30 days) and then deleted.